OptinMonster makes it easy to integrate the Facebook Pixel with your campaigns.
In this article, you’ll learn how to add Facebook’s Pixel tracking code to your OptinMonster campaigns.
Before You Start
Here are some things to know before you begin:
- Due to the advanced nature of this guide, at this time we do not provide support for Facebook Pixel implementation.
- The Success Scripts implementation option in this guide requires a Growth subscription.
- This guide provides additional options for implementing the Facebook Pixel that are available with all plans.
Facebook Pixel Base Code
Before you can implement the Facebook Pixel with your OptinMonster campaigns you’ll need to add the Base Code to the website where your campaign(s) will appear.
Facebook recommends that you add the Base Code for the Facebook Pixel to all pages of your site in their Facebook Pixel documentation.
The Standard Event code is what will be added to your OptinMonster campaign in the next steps.
Example of Standard Event Code
<br><script><br>fbq('track', 'Lead');<br></script><br>There are several different approaches you can choose to add the Facebook Pixel to your OptinMonster Campaign. We’ll walk through each option step-by-step.
Add Pixel via Success Scripts
If you are using one of our native integrations, the easiest way to implement the Facebook Pixel with your OptinMonster campaign(s) is using Success Scripts.
Success Scripts requires a Growth subscription. If you are using a Custom HTML integration be sure you’ve edited your custom form to track conversions when submitted.
Add Pixel via HTML Block
If you do not have a Growth subscription or would like to trigger the Facebook Pixel on a different event than conversion, you can use our Javascript Events API.
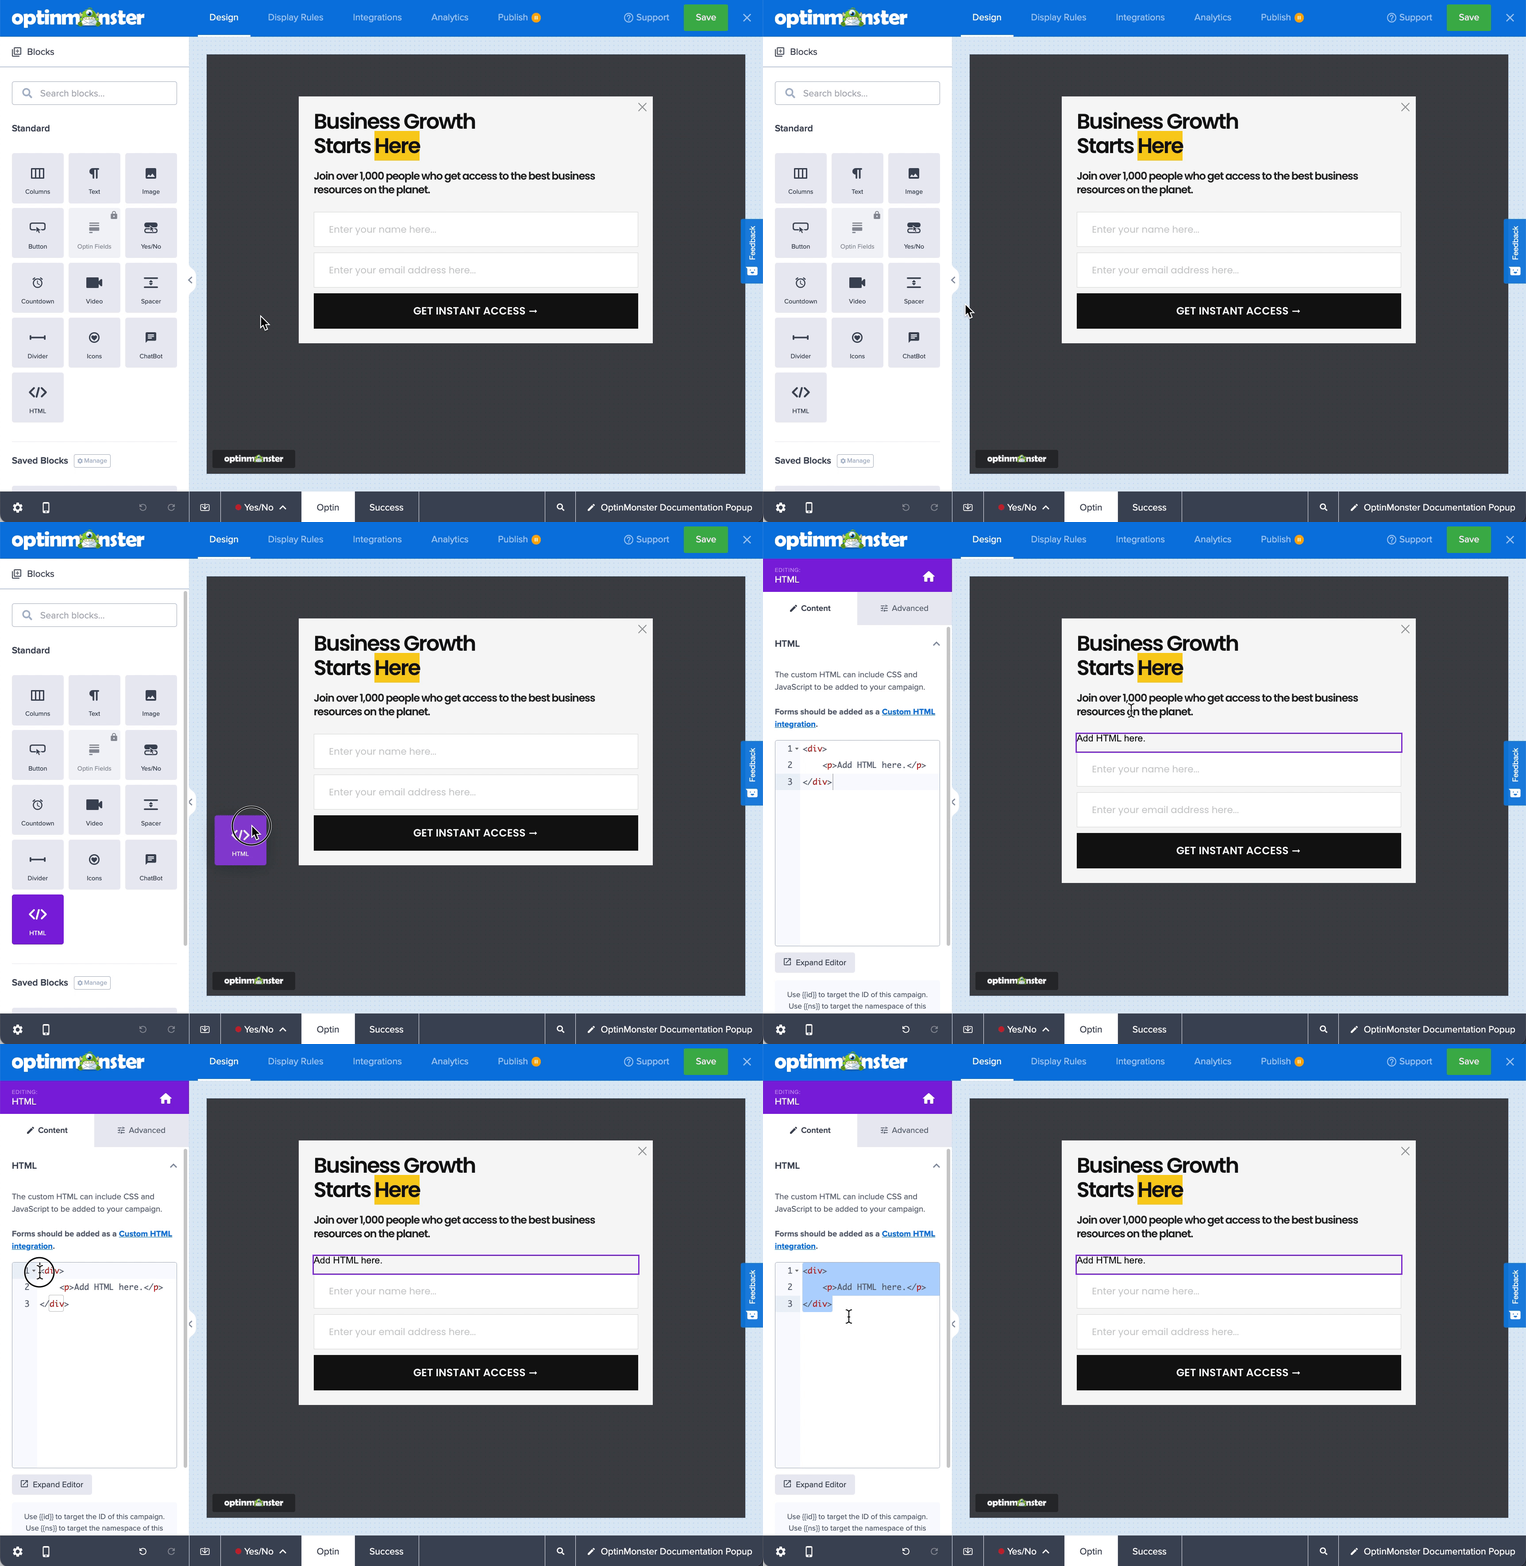
Follow these steps to add the Facebook Pixel using an HTML Block.
- First, you will need to determine which event your Facebook Pixel should be fire on. All OptinMonster events are outlined in our Javascript Events API doc.
- Next, add an HTML Block to your campaign.
- Add your Facebook Pixel code to the HTML Block.
- When you’re finished, click Save.
HTML Block Examples
The following are some examples you can use to get started triggering your Facebook Pixel on different OptinMonster Javascript Events.
Trigger Facebook Pixel on Successful Conversion
<br><script><br>document.addEventListener('om.Optin.success', function(event)<br>if (event.detail.Campaign.id === "{{id}}") {<br>// Your Facebook Pixel Code<br>}<br>});<br></script><br>Trigger Facebook Pixel When Campaign is Closed
In this example, the om.Optin.close event will fire only when the campaign is closed.
<br><script><br>document.addEventListener('om.Optin.close', function(event)<br>if (event.detail.Campaign.id === "{{id}}") {<br>// Your Facebook Pixel Code<br>}<br>});<br></script><br>Trigger Facebook Pixel When Campaign First Shows
In this example, the om.Optin.afterShow event will fire only after the campaign becomes visible.
<br><script><br>document.addEventListener('om.Optin.afterShow', function(event)<br>if (event.detail.Campaign.id === "{{id}}") {<br>// Your Facebook Pixel Code<br>}<br>});<br></script>FAQs
How can I trigger a different Facebook Pixel event?
You may need to customize the specific Standard Event to fit your needs, please refer to this list of Facebook Pixel Standard Events for what’s available.
Do I have to add the code to an HTML Block in the campaign builder?
No, you can use the Success Script option if you have a Growth subscription or you can add the Javascript directly to your website where the campaign will appear to visitors.
How can I add JavaScript to my WordPress site?
See how to add JavaScript to your WordPress site by following this guide.
If you’re serious about jumpstarting your website business growth, then get started with OptinMonster today!
Get Started With OptinMonster Today!BONUS: Done-For-You Campaign Setup ($297 value)
Our conversion experts will design 1 free campaign for you to get maximum results – absolutely FREE!
Click here to get started →


